
TAKE ACTION
Run sales plays
You have your Action List. Now it is time to put it to work. The Co-Sell Engine gives you five plays to choose from depending on who you want to reach and how. Each play follows the same starting pattern: click Start, select your Action List and sequence, then walk through a short wizard. This article covers each play in the order they appear on screen.
Before you start
Confirm these three things before running any play:
- Action List: You have a saved Action List (opens in a new tab) ready in the Co-Sell Engine.
- Owner data: The Name and Email fields for every Account Owner in your list are filled out. These are required for automated routing.
- Custom contact groups: If your workflow targets stakeholders beyond standard account owners (RVPs, MDRs, specialists), confirm those groups are configured in Admin Center under Data > Custom Column Editor.
How every play begins
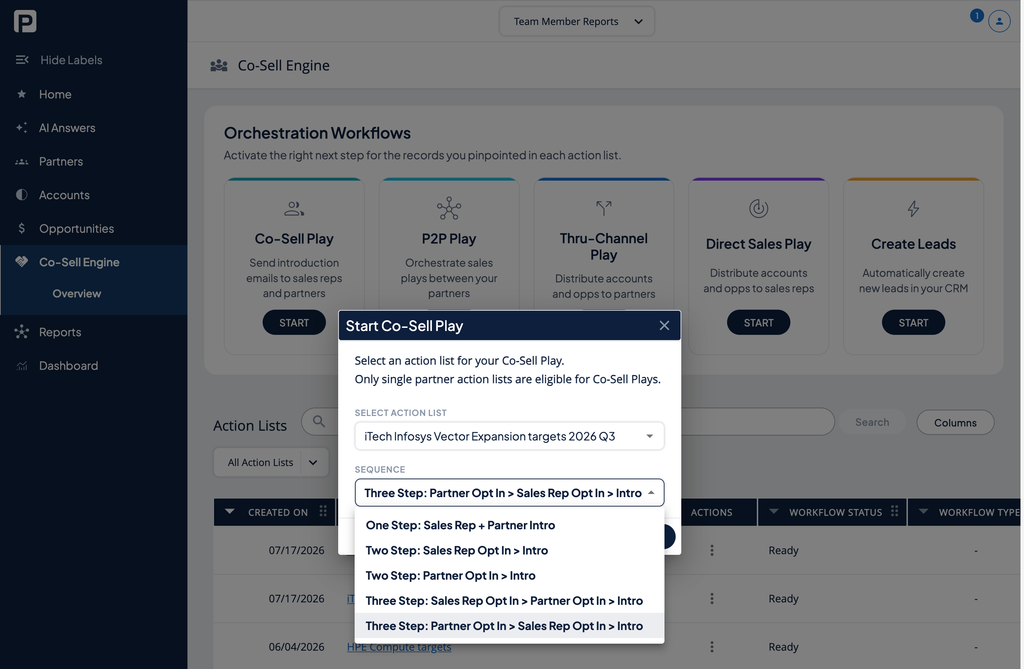
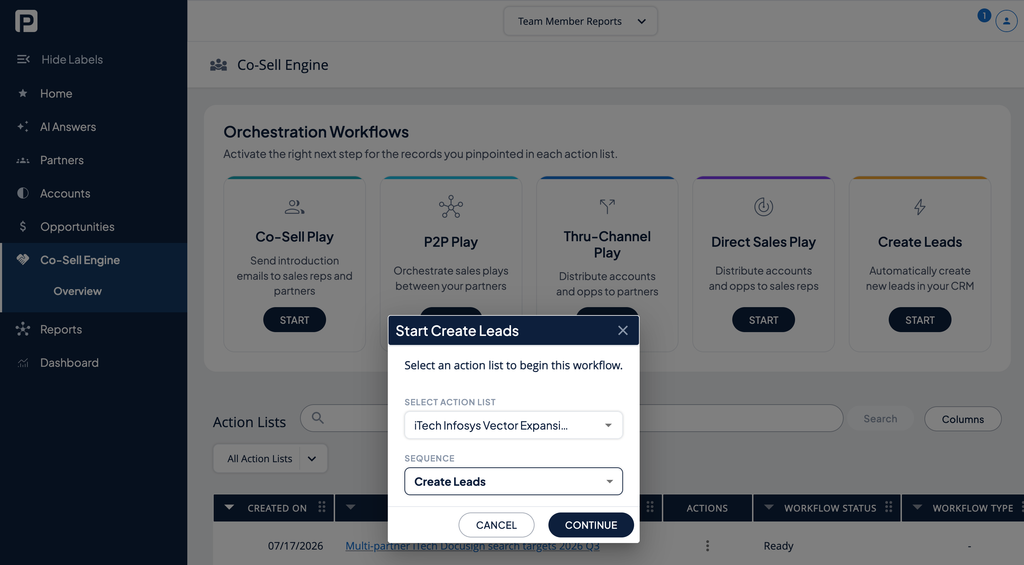
Click Start on any play tile. A modal appears where you:
- Select an Action List from the dropdown. Each play has eligibility rules described below.
- Select a Sequence. The sequence controls the number of emails and the order they go out. Some plays have one option. Others have several.
- Click Continue to enter the wizard.
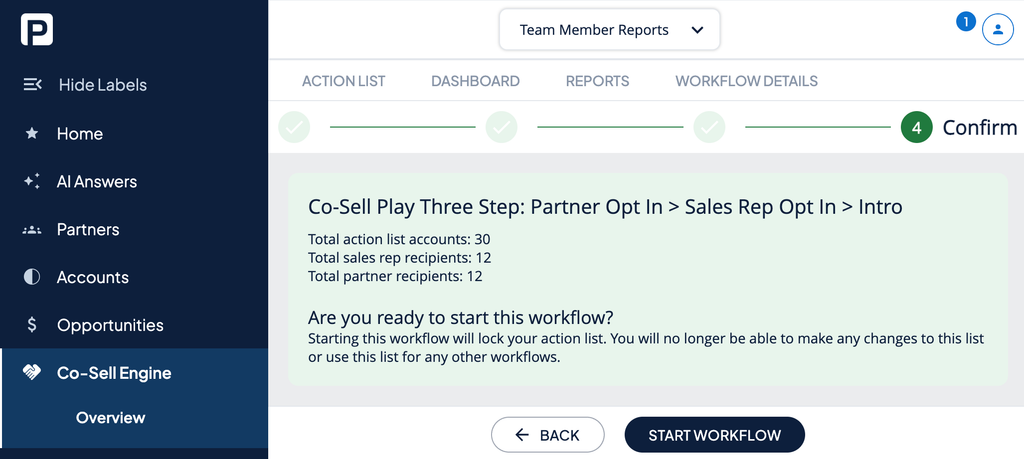
At the end of every wizard, a Confirm screen summarizes the play, sequence, and recipient count. Clicking Start Workflow locks the Action List and launches the play. You can also start a play directly from an Action List. Open any Action List, select a workflow type and sequence from the dropdown in the Take Action section, and click Start.
Important: Once a workflow starts, the Action List is locked. You cannot edit it or run it through a different play. Clone the list first if you need to make changes.
Send introduction emails between your sales reps and your partner reps on matched accounts. Supports multiple opt-in sequences so you can control who commits first before the introduction is made.
Eligibility: Single-partner Action Lists only. Sequences: Five options.
- Click Start on the Co-Sell Play tile.
- In the modal: select your Action List and choose a Sequence:
- One Step: Sales Rep + Partner Intro
- Two Step: Sales Rep Opt In > Intro
- Two Step: Partner Opt In > Intro
- Three Step: Sales Rep Opt In > Partner Opt In > Intro
- Three Step: Partner Opt In > Sales Rep Opt In > Intro
- Click Continue.
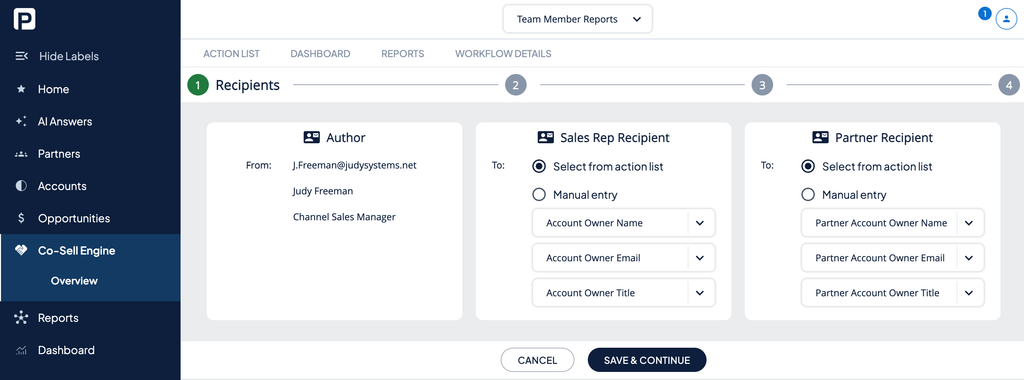
- Step 1: Recipients. Three columns: Author, Sales Rep Recipient, and Partner Recipient. Map name, email, and title columns for both your reps and your partner reps. Click Save & Continue.
- Step 2: Messages. Email cards appear based on your sequence. Each card shows who receives it, when it triggers, the default subject line, and an Optional message field. Add your campaign context to each card. Click Continue.
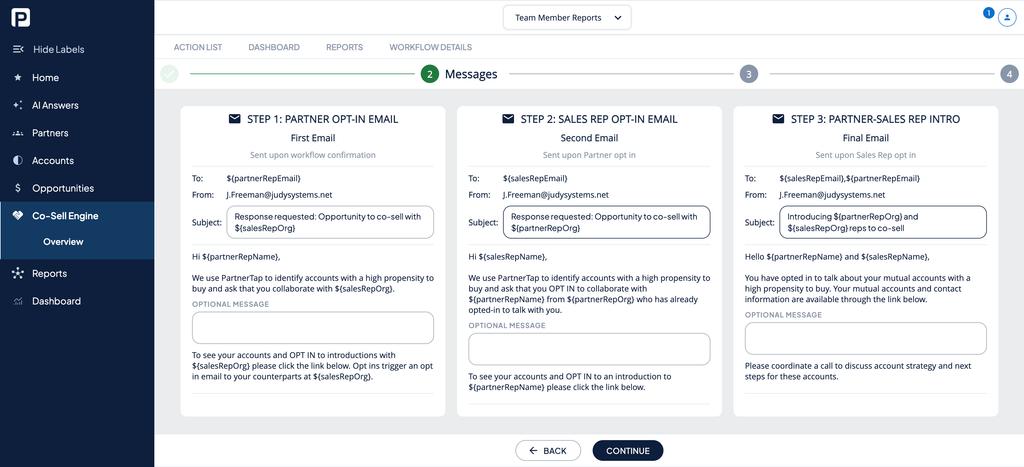
Note: In multi-step sequences, the first recipient receives all their accounts in a single email and can opt in or out per account, or confirm all at once. Subsequent recipients receive individual emails for each account the previous recipient opted into. Brief your team before launch.
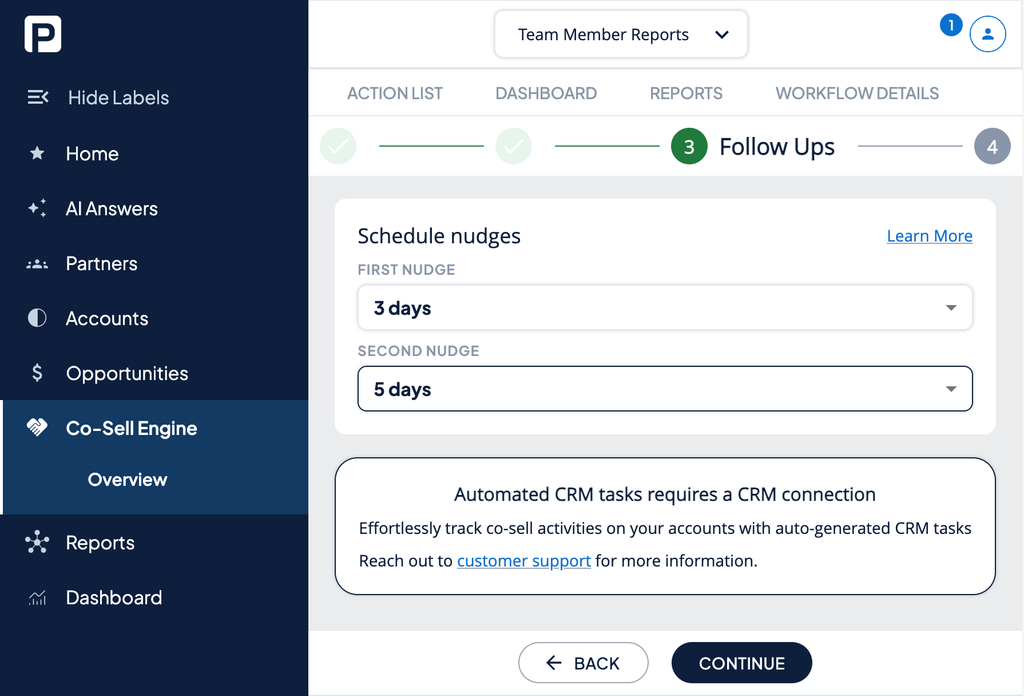
- Step 3: Follow Ups. Schedule nudge emails for recipients who have not responded. Set a First Nudge and, optionally, a Second Nudge interval. Click Continue.
- Step 4: Confirm. Review the summary and click Start Workflow.
Introduce two of your partners to each other to work accounts together, without your reps being directly involved.
Eligibility: Multi-partner Action Lists only. These are lists saved from Ecosystem Global Reports where accounts from multiple partners appear together. Single-partner lists will not appear in the dropdown. See: Create Action Lists (opens in a new tab).
Sequences: Three options.
- Click Start on the P2P Play tile.
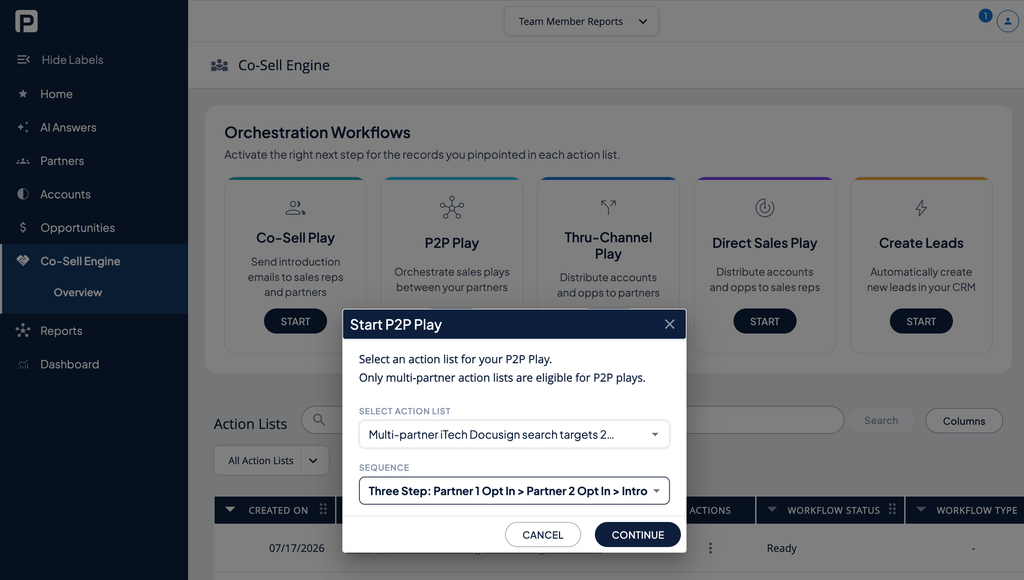
- In the modal: select a multi-partner Action List and choose a Sequence:
- One Step: Partner Intro
- Two Step: Partner Opt-in > Intro
- Three Step: Partner 1 Opt In > Partner 2 Opt In > Intro
- Click Continue.
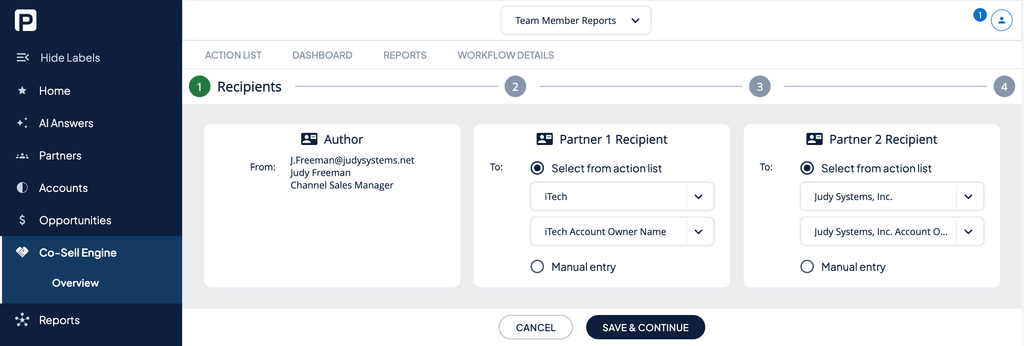
- Step 1: Recipients. Three columns: Author, Partner 1 Recipient, and Partner 2 Recipient. Map the contact columns for each partner org from your Action List. Click Save & Continue.
Complete the Messages (Step 2) and Follow Ups (Step 3) steps, then click Start Workflow on the Confirm screen.
Distribute accounts and opportunities directly to your partner reps so they know which accounts to work on.
Eligibility: Single-partner Action Lists only. Sequence: Distribute Records to Partners (pre-selected, one option).
- Click Start on the Thru-Channel Play tile.
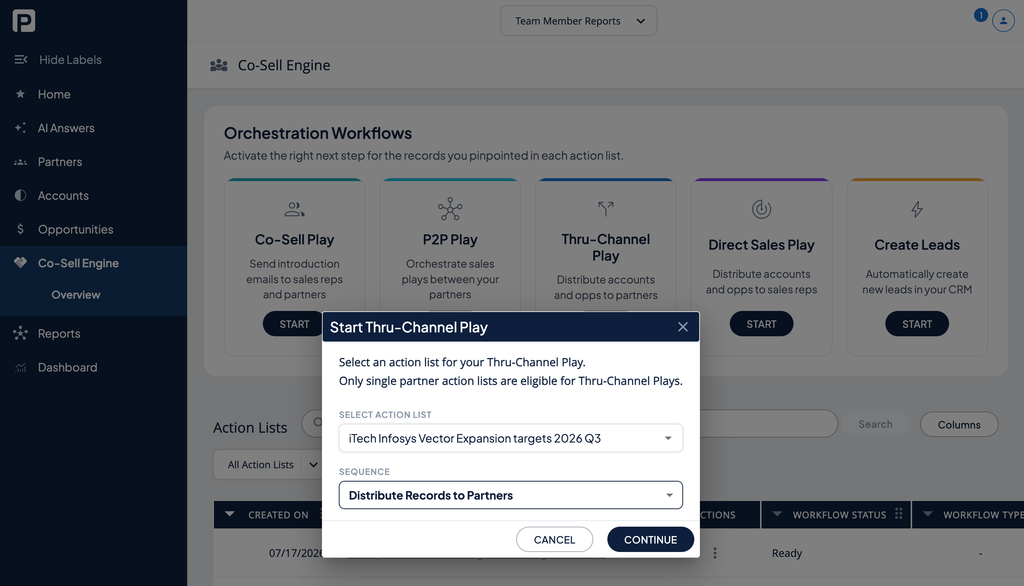
- In the modal: select your Action List. The sequence is pre-set. Click Continue.
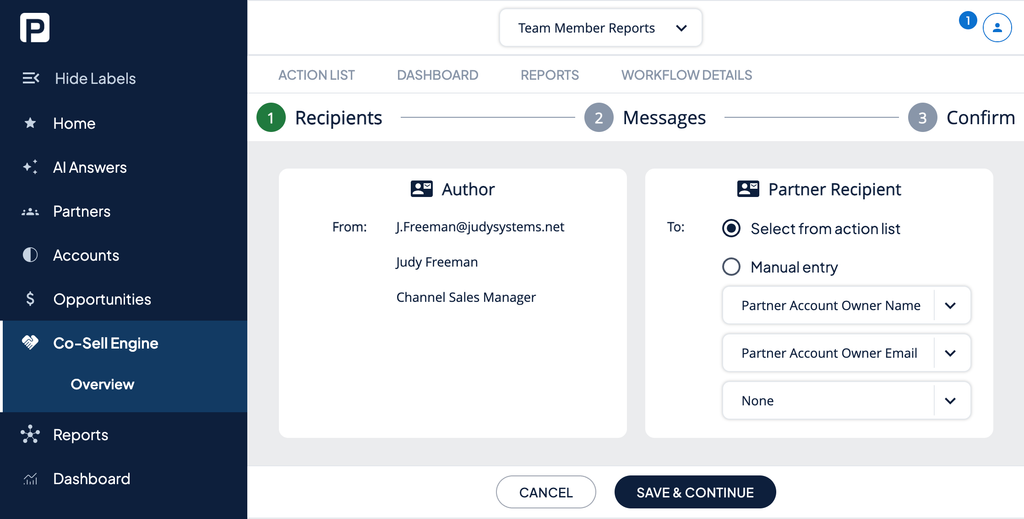
- Step 1: Recipients. Two columns: Author (auto-populated) and Partner Recipient. Map the Partner Account Owner Name, Email, and Title columns from your Action List. Click Save & Continue.
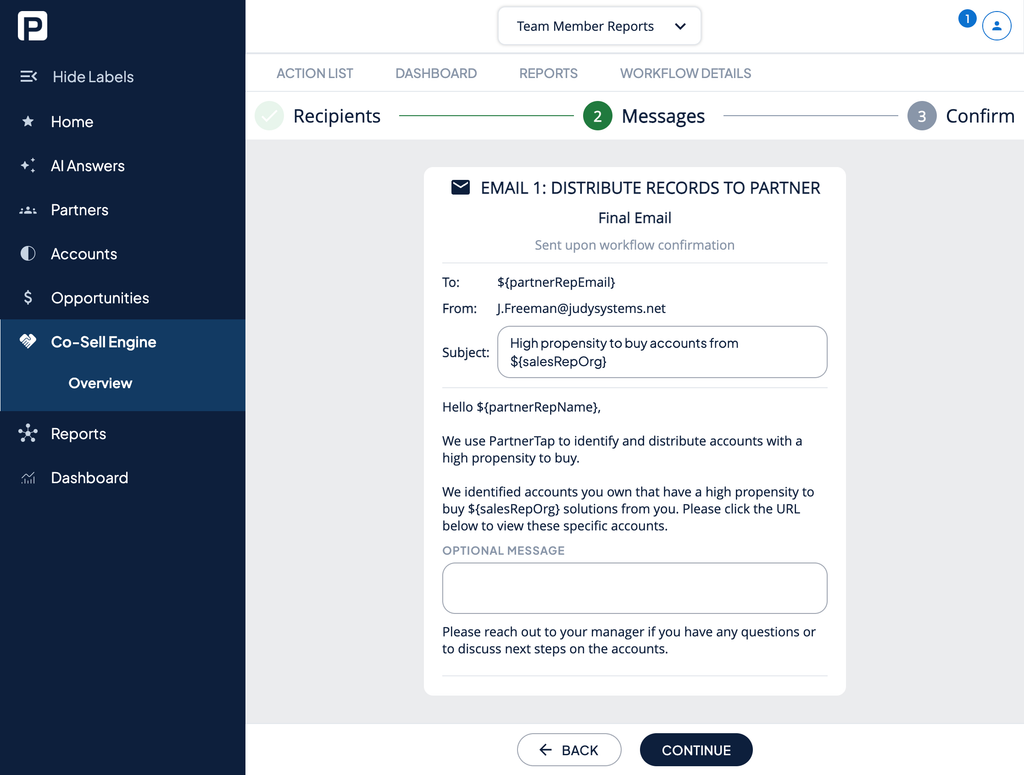
- Step 2: Messages. One email card appears: EMAIL 1: DISTRIBUTE RECORDS TO PARTNER. Add your optional message and click Continue.
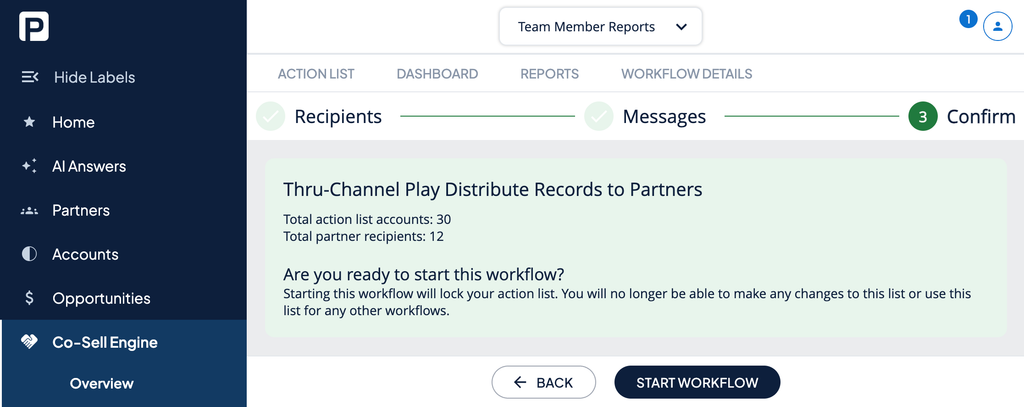
- Step 3: Confirm. Review the summary and click Start Workflow.
Distribute accounts to your internal sales reps without partner involvement.
Eligibility: Single-partner Action Lists. Sequence: Distribute Records to Sales Reps (pre-selected, one option).
- Click Start on the Direct Sales Play tile.
- In the modal: select your Action List. The sequence is pre-set. Click Continue.
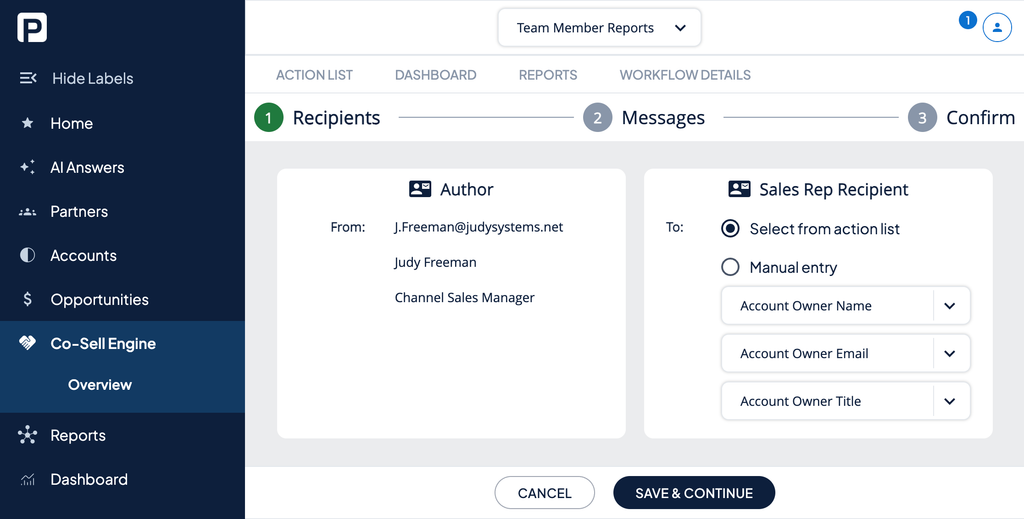
- Step 1: Recipients. Two columns: Author and Sales Rep Recipient. Map the sales rep name, email, and title columns. Click Save & Continue.
- Step 2: Messages. One email card appears. Add your optional message. Click Continue.
- Step 3: Confirm. Review and click Start Workflow.
Create Leads
Push Action List accounts into your CRM as new lead records automatically, without sending any emails.
Eligibility: Any Action List. Sequence: Create Leads (pre-selected, no choice required).
- Click Start on the Create Leads tile.
- In the modal: select your Action List. The sequence is pre-set to Create Leads. Click Continue.
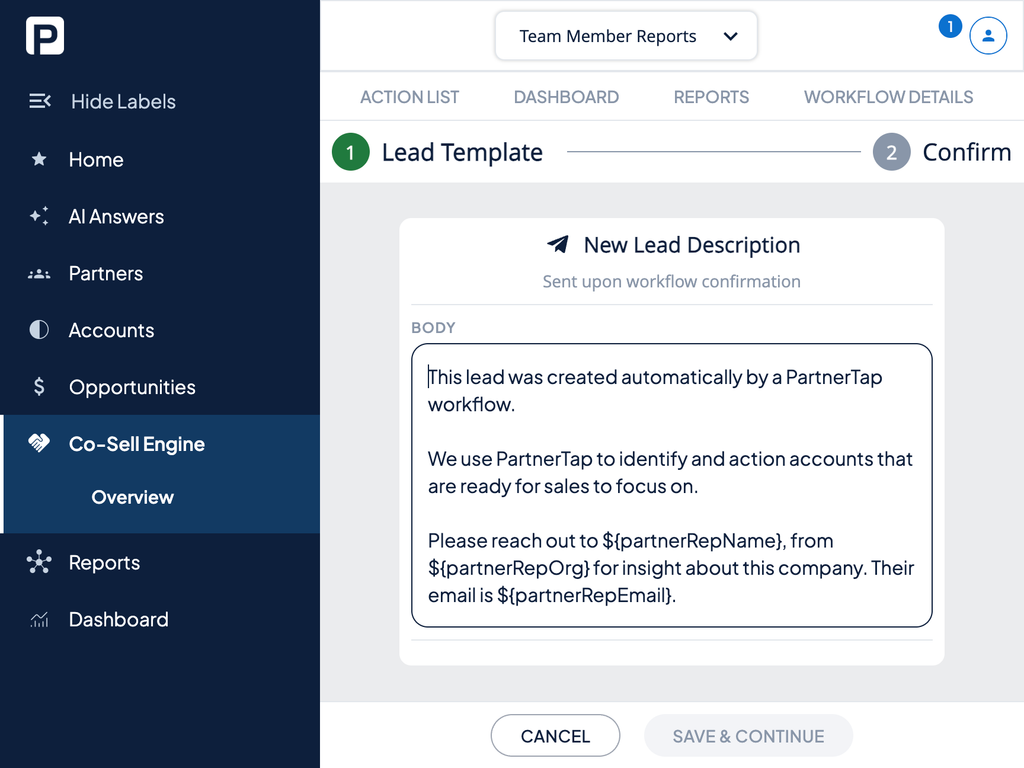
- Step 1: Lead Template. Review the default lead description that will be used for new records created in your CRM. Click Save & Continue.
- Step 2: Confirm. Review and click Start Workflow.
Important: Create Leads requires your CRM to be connected to PartnerTap. If you have not connected yet, go to the Data Manager first and follow the steps. See: Prepare your data (opens in a new tab).
After you launch
Click the name of your Action List in the Co-Sell Engine table to open an Overview. Four tabs are available:
- Action List: The accounts in the list.
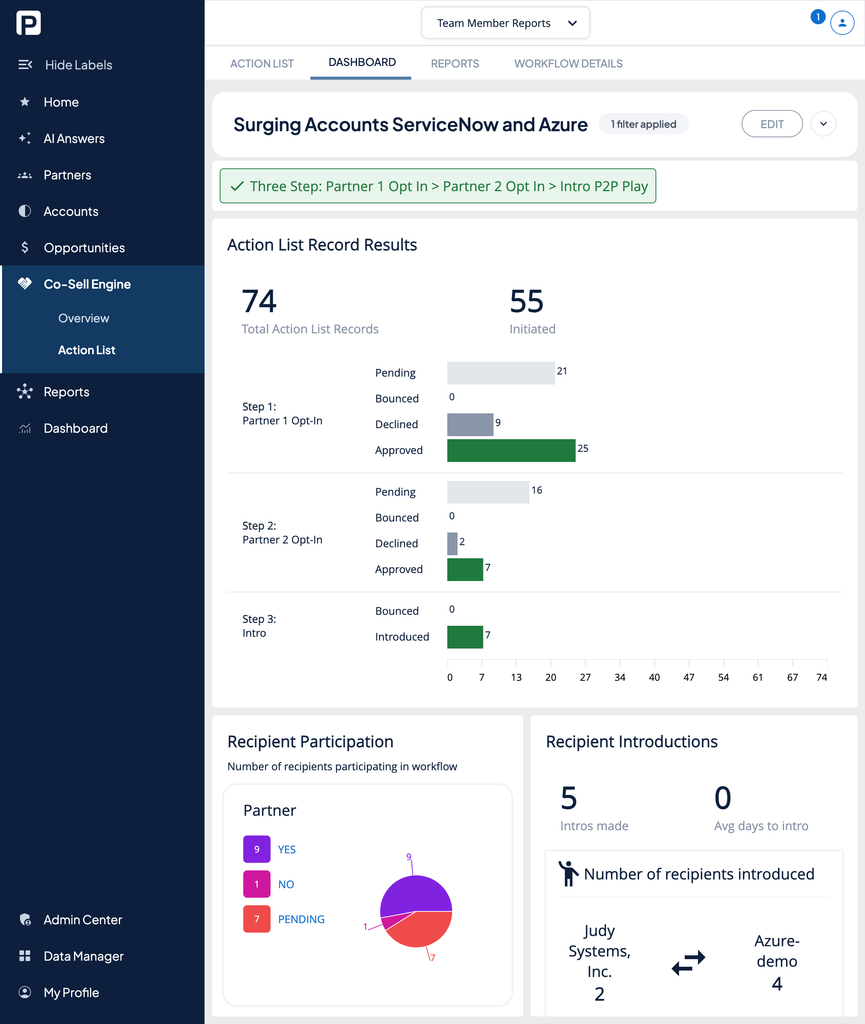
- Dashboard: Tracks workflow progress in real time. Shows total records, total initiated, and a step-by-step breakdown of Pending, Bounced, Declined, and Approved responses at each stage of your sequence.
- Reports: Two reports. Sales play workflow results shows which accounts were actioned and by whom. All opps created after co-sell action shows new pipeline that emerged after the play launched.
- Workflow Details: Provides the setup information – details about how the workflow was configured.
Want to scale?
See the leading multi-partner co-selling platform.
Invited by a partner?
Sign up for a free PartnerTap account.