Step-by-step instructions
We give you two ways to bring your CRM data into PartnerTap: via real-time sync with your CRM or a manual data upload via a spreadsheet.
It only takes a few clicks to sync data from your CRM
To begin syncing your CRM data do the following:
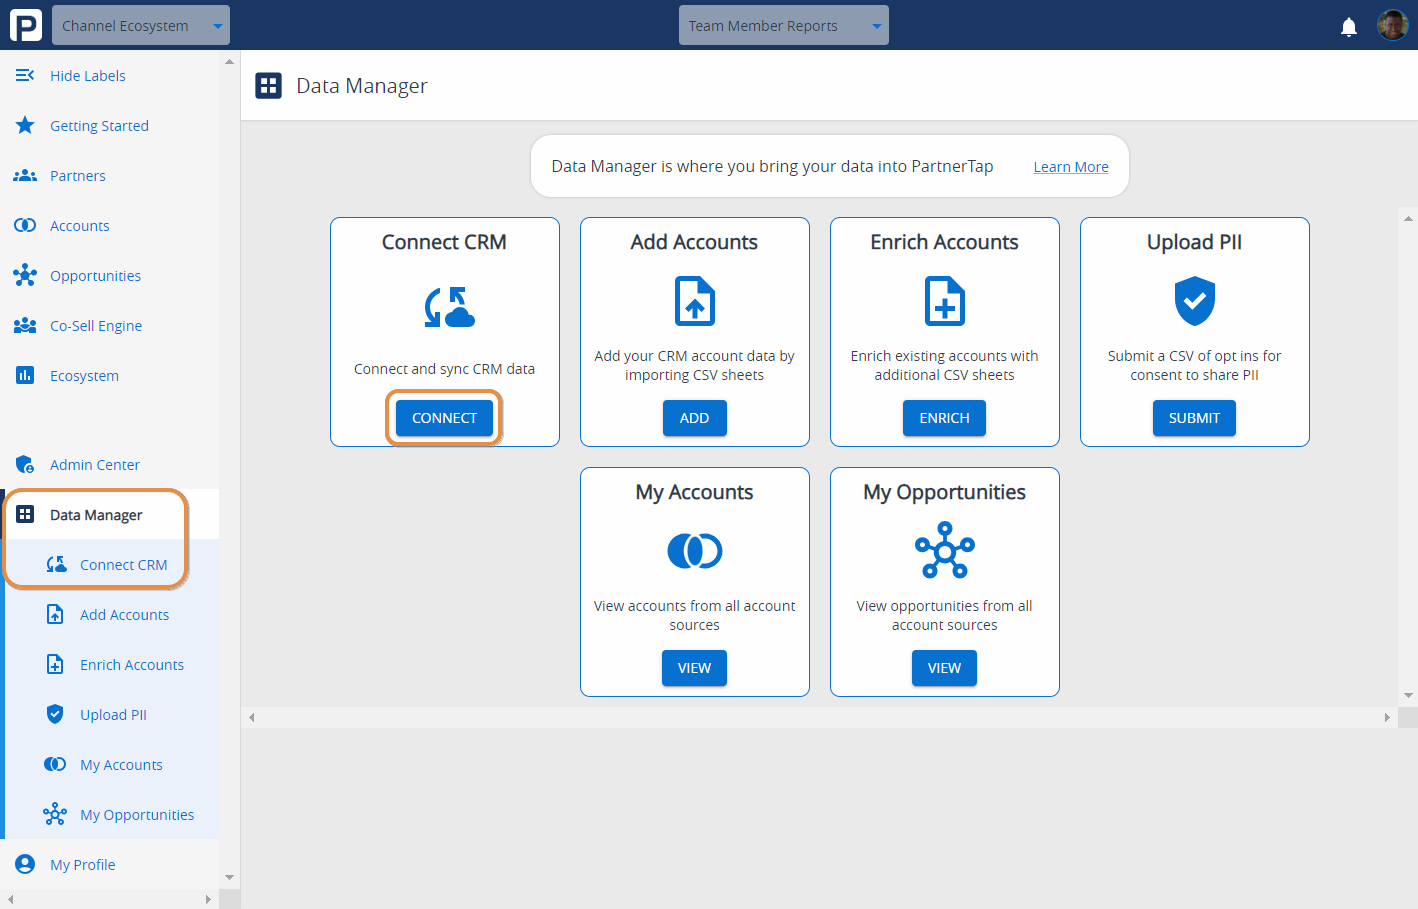
- In your PartnerTap account, navigate to the bottom of the left-hand side menu and click “DATA MANAGER”.
- On the “DATA MANAGER” page, look for the “CONNECT CRM” tile and click “CONNECT”.
- Locate the tile with your CRM and click “CHOOSE CRM”.
- This will redirect you to your SSO login page where you can use your CRM username and password to securely login.
- You can use your personal CRM login for this sync. This will bring in all accounts that you have visibility to.
- A best practice for enterprises is to create an integration user in your CRM, give it access to the accounts and opportunities you want to pull into PartnerTap, and then use this integration username and password on the SSO login page in the Data Manager.
- Once your CRM authenticates you, it will start automatically syncing your data into PartnerTap.
- You will receive an email once your data sync is complete.

If you’re not yet ready to sync data directly from your CRM you may upload your account data manually from a .csv file
Here are six requirements for preparing account lists for manual upload into PartnerTap:
- It must be a .csv file.
- It cannot be a multi-tab workbook (you will need to save each tab as individual workbooks and .csv files).
- It must include at a minimum two columns: Account Name and Account Type (i.e. customer or prospect).
- Make sure every column header has a name.
- Delete the 10-15 columns following the last column with data to avoid uploading errors.
- Include as much data as possible to increase account matches.
For guidance on the type of information you should include when you upload your account sheets, review this CSV GUIDE and download this SAMPLE SHEET.
We recommend adding as many account and location details as possible. We know that account data is never perfect or complete – but including whatever account level data you have will improve your account mapping results.
When your sheet(s) is ready for upload take the following steps:
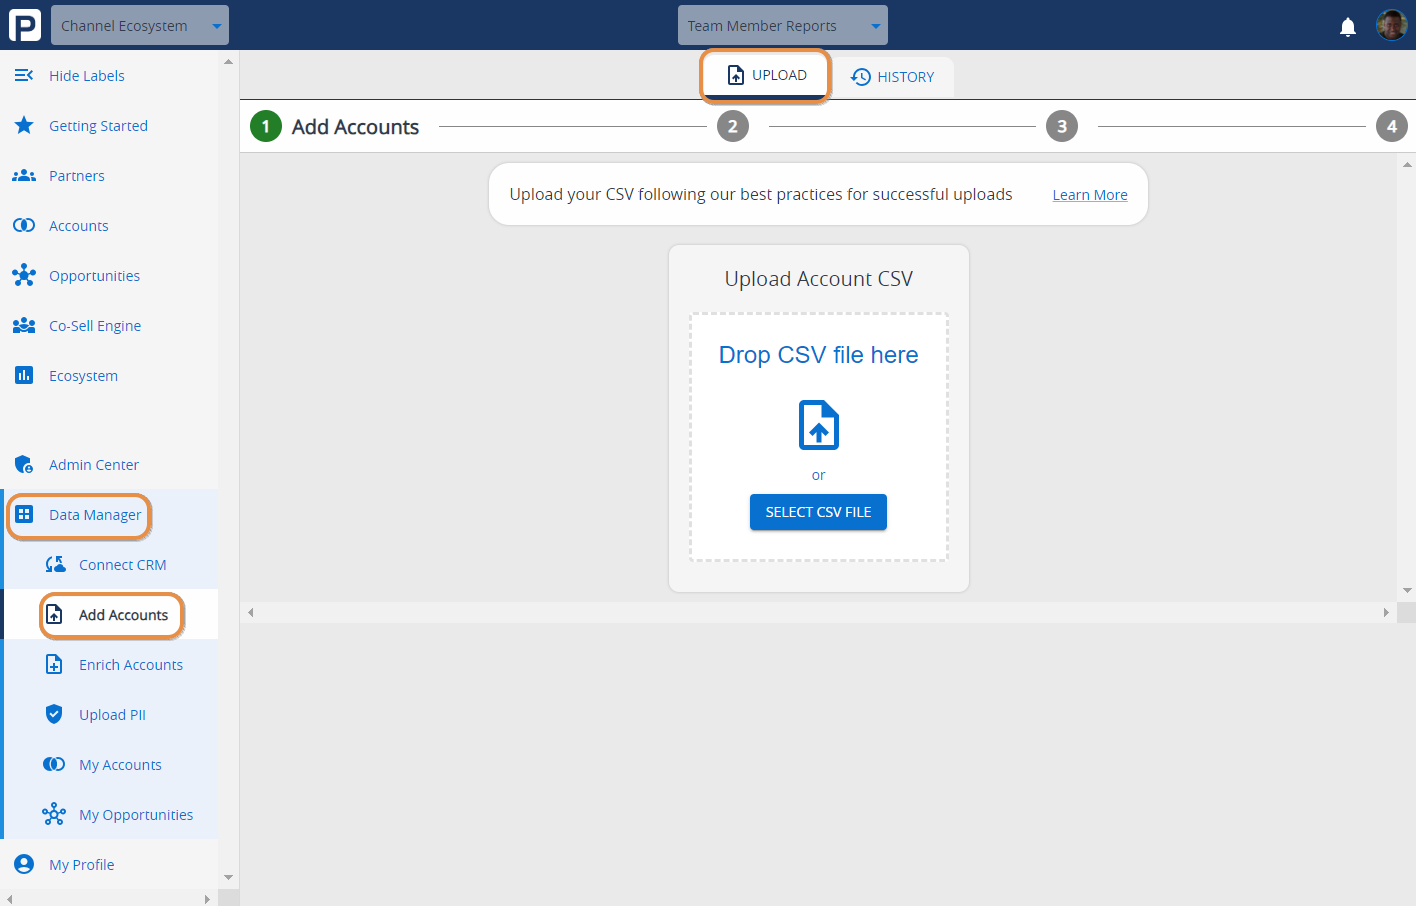
- Navigate to the left-hand side menu and select “DATA MANAGER”.
- On the “DATA MANAGER” page, look for the “ADD ACCOUNTS” tile and click “ADD”.
- Add your .csv account list file by drag and drop or by clicking the blue “SELECT CSV FILE” button.
- Once you select the file, you will be prompted to name the file and add a description. When you are done, click “UPLOAD”.
- PartnerTap will begin mapping the columns from your spreadsheet to our required columns. Columns that have been mapped have a green checkmark next to them.
- Confirm the columns have been mapped correctly by reviewing the sample data pulled in from the column.
- Use the drop down menus to choose a different column if necessary (e.g. our standard column is “Account Name” which might be called “Company Name” in your file).
- When ready, click “CONTINUE”.
- Next you will confirm the recommended columns have been mapped correctly. Columns that have been mapped have a green checkmark next to them. We highly recommend including an Account ID to support future data refreshes and data enrichments.
- Confirm the columns have been mapped correctly by reviewing the sample data pulled in from the column.
- Use the drop down menus to choose a different column if necessary.
- When ready, click “CONTINUE”.
- Last, select which custom columns to include in your upload and tag any that contain PII (Personally Identifiable Information). When ready, click “DONE”.
- Custom columns are not used in account mapping but are important for enhancing reporting granularity and building hyper-targeted action lists. You will still have full control over which columns are shared to each partner.
- Tagging columns as PII is optional and only applicable for organizations that have opt-in/opt-out policies for sharing employee information.
- To add additional sheets, click “ADD ANOTHER SHEET” and repeat steps 3-7.

Review your CRM account data
Whether you add your data by syncing directly with your CRM or manually uploading accounts, you will want to confirm that all your accounts made it into PartnerTap.
Step-by-step instructions
To review your accounts:
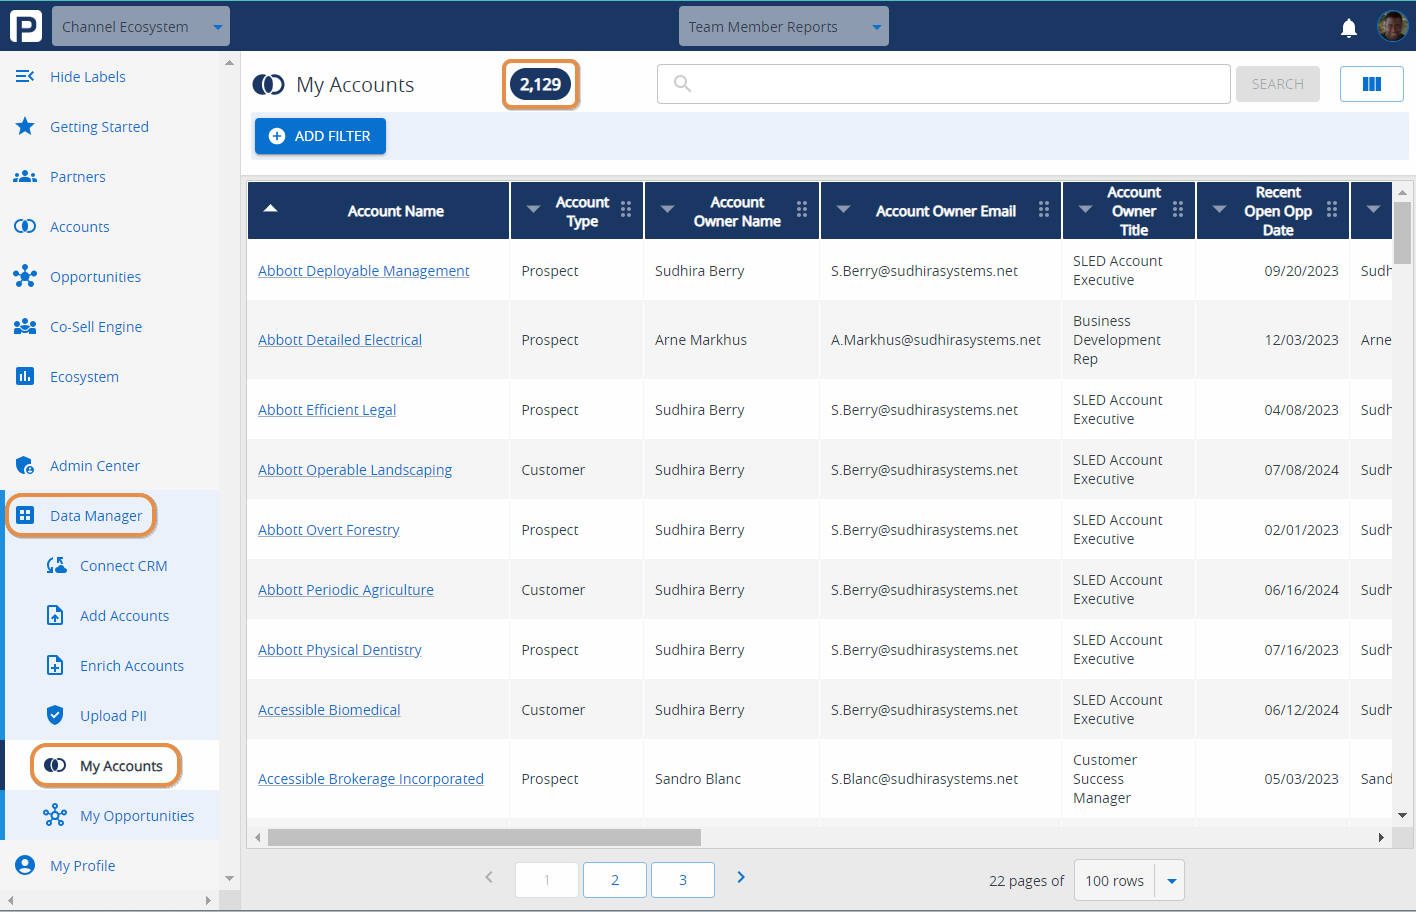
- Navigate to the bottom of the left-hand side menu and select “DATA MANAGER”.
- From the “DATA MANAGER” page look for the tile that says “MY ACCOUNTS”. Click “VIEW”.
- On this page you can see all your accounts individually and a sum of your total accounts at the top.
